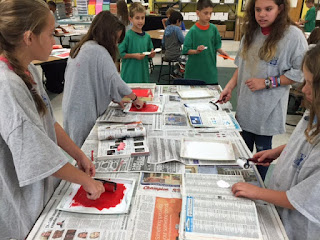
The first major challenge after the drawing challenge of our sketchbook covers was to make reductive foam prints. I showed them a PowerPoint on intaglio printing, and discussed how Styrofoam printmaking is sort of like intaglio, since we scratch our image into our plates. If you're interested in the PowerPoint, you can email me at paschal@fultonschools.org.
We started out by doing a mind map in our sketchbooks. Given a choice of 6-7 words, students developed a four-pronged mind map that had four legs/words and led to at least four degrees of separation from the beginning word they chose. Their choices were: courage, laughter, honesty, morning, curious, quiet, green. Here's an example of one student's mind map:
 |
If they wanted to, they could have more than 4 words off from the original word, and they could go more than 4 degrees of separation. This student chose to make her print about clothes.
|
Once they got their ideas solidified, they drew a picture of their planned print on a half-sheet of copy paper. The foam plates we were using were 6" x 12," so they it helped them to know what size their picture would be for their print. I reminded them to keep from making too many little details, as they did not translate well onto the printing plate later on. They also had to make sure that they made any words backwards, as they would be printed forwards when they pulled the print. Most of them used tracing paper to make their drawings, if they wanted to put words on their plates. I tried to discourage it, though, as it's so easy to make the mistake of putting one letter backwards...
Once they got their drawing finished, I gave them a foam plate and a ballpoint pen. They put their drawing on top of the plate and then traced, with a lot of pressure, onto the plate. Afterward, they went back and retraced their lines on the plate, so that it would be deep enough to keep from getting filled with ink.
 |
| Sometimes the ballpoint pen does not leave a mark with the ballpoint ink, but as long as the image is pressed deeply, that doesn't really matter. |
I set up two colors on one side of the table, two colors on the other side, and a third color at a different table. Kids go up to the colors they need, ink their plates at the inking table, and then take the plate back to their own table and bray it on the paper there. It keeps things from getting wildly messy. They're responsible for keeping their own area cleaned up, and they get points off for lots of smudges.
When they have inked their plate once, they cut away anything that they want to stay that color, or they cut out things they want to make another color--either way works. Below is an example of how it works.
 |
| I actually took this off of the internet, but it explains it all quite nicely. I apologize to whomever it belongs--there was no citation. If it's yours, please let me know!
|
Here are some of the works the 5th graders produced.
The kids did a great job. They worked so hard to get good, clean prints. Afterward, we had a gallery walk--the students took their best print, their original drawing, and their mind map and put it neatly on the table top where they sat, and set up a space for their peers to come look at the process they used to make their prints. They were all impressed with each others' work and we had some great conversation about the process, the difficulties, and the rewards of developing a plan for their artwork before executing it.
 |
| The gallery walk |


No comments:
Post a Comment