Showing posts with label printmaking. Show all posts

Thursday, November 17, 2016

5th Grade Reductive Prints, and Drawing Challenges

It's feast or famine with me.  I don't know how some folks manage to blog all the time.  Do they not have life stuff that happens?  Do they sleep?  I'm looking at going to our Thanksgiving break, and I'm determined to post some stuff that we've done this semester.  Gearing up to start Choice- Based Art in the second semester, we are doing all kinds of challenges so that we've used our various art supplies/mediums prior to me letting them loose with the whole Art Room at their disposal. 


The first major challenge after the drawing challenge of our sketchbook covers was to make reductive foam prints.  I showed them a PowerPoint on intaglio printing, and discussed how Styrofoam printmaking is sort of like intaglio, since we scratch our image into our plates.  If you're interested in the PowerPoint, you can email me at paschal@fultonschools.org.


We started out by doing a mind map in our sketchbooks.  Given a choice of 6-7 words, students developed a four-pronged mind map that had four legs/words and led to at least four degrees of separation from the beginning word they chose.  Their choices were:  courage, laughter, honesty, morning, curious, quiet, green.  Here's an example of one student's mind map:

If they wanted to, they could have more than 4 words off from the original word, and they could go more than  4 degrees of separation.  This student chose to make her print about clothes.  
The students all agreed that having the mind map really made a difference in how they chose their subject matter for their prints.  This was a great way to get them to think in new directions and to choose something that had some real meaning to them.  It made for some interesting choices.


Once they got their ideas solidified, they drew a picture of their planned print on a half-sheet of copy paper. The foam plates we were using were 6" x 12," so they it helped them to know what size their picture would be for their print.  I reminded them to keep from making too many little details, as they did not translate well onto the printing plate later on.   They also had to make sure that they made any words backwards, as they would be printed forwards when they pulled the print.  Most of them used tracing paper to make their drawings, if they wanted to put words on their plates.  I tried to discourage it, though, as it's so easy to make the mistake of putting one letter backwards...


Once they got their drawing finished, I gave them a foam plate and a ballpoint pen.  They put their drawing on top of the plate and then traced, with a lot of pressure, onto the plate. Afterward, they went back and retraced their lines on the plate, so that it would be deep enough to keep from getting filled with ink.
Sometimes the ballpoint pen does not leave a mark with the ballpoint ink, but as long as the image is pressed deeply, that doesn't really matter.
They began their printing process.  I like to use phone books and catalogs to put the printing plates on when they are inking; it keeps the table from being a crazy mess.  Once they finish inking, they have to turn the page for the next person.  
I set up two colors on one side of the table, two colors on the other side, and a third color at a different table.  Kids go up to the colors they need, ink their plates at the inking table, and then take the plate back to their own table and bray it on the paper there.  It keeps things from getting wildly messy.  They're responsible for keeping their own area cleaned up, and they get points off for lots of smudges.


When they have inked their plate once, they cut away anything that they want to stay that color, or they cut out things they want to make another color--either way works.  Below is an example of how it works. 

I actually took this off of the internet, but it explains it all quite nicely.  I apologize to whomever it belongs--there was no citation.  If it's yours, please let me know!


Here are some of the works the 5th graders produced. 


The kids did a great job.  They worked so hard to get good, clean prints.  Afterward, we had a gallery walk--the students took their best print, their original drawing, and their mind map and put it neatly on the table top where they sat, and set up a space for their peers to come look at the process they used to make their prints.  They were all impressed with each others' work and we had some great conversation about the process, the difficulties, and the rewards of developing a plan for their artwork before executing it. 
The gallery walk


Friday, March 15, 2013

STEAMing Forward

I'm passionate about STEAM.  Not condensating water, but Science, Technology, Engineering, Art, and Math.  I think it's short-sighted to call for STEM without adding Art into the mix--if you look at Bloom's Taxonomy, it's been revamped, and Creativity is at the top.  The apex.  The penultimate.  It's what we are supposed to be racing toward, spiraling to that self-actualizing goal of creative thinking.  Thinking outside the box.

Where else are you going to find that, than in an Art classroom?  Every day Art teachers challenge their students to think in new ways, solve problems, and find ways around obstacles.  Art class is a soup of creativity and out-of-the-box thinking. 

Our first graders got a chance to talk technology recently.  We began with a huge conversation about what I didn't have growing up--no microwave, no cell phone, no Internet or computers in our homes, no dvds, no iPads, iPods, iTouches, iPhones, i-anything!  And oh my, we actually played outside until dark and we didn't like to be indoors.  Go figure.  The First graders were mystified.  Did you have tv?  Did you have indoor plumbing?  Did you have cars?  Take it easy kiddos, I'm not THAT old.  My growing up years sounded like the cave days to them.

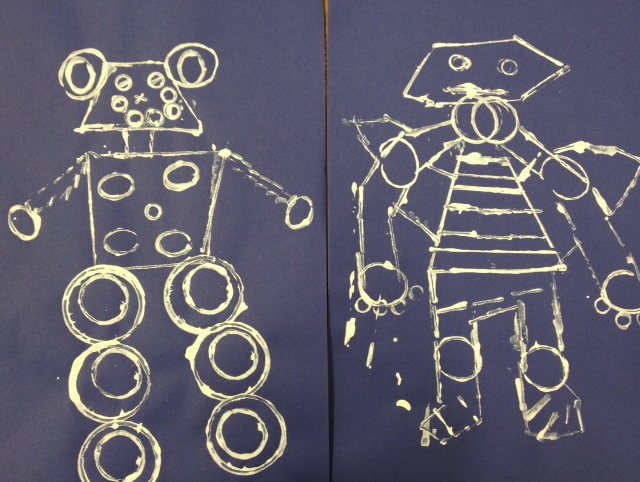
But we did get a good chance to talk about the very technologies that have occurred in their lifetimes, like the advent of the iPad and tablets.  We discussed robotic arms that do surgery for doctors and robots that build cars and the role of engineering in all of the cool technology that comes our way every day.  We decided that we liked the robot thing a lot--and that it would be really neat if we had our own personal robots to do things for us.  What if we had a robot who would clean our room for us?  Or take out the trash?  Or clean the kitty litter box?  I wanted a robot to clean up all the Art room messes!  And so we became engineers.

My robot is ready to clean the Art Room.

First, we designed robots in our sketchbooks, and wrote what they did for us.  The next week we came in and talked about technology some more, and how we could use found objects to create a different kind of robot than the one we drew--one that was made from stamping our lines with the found objects.  Below you will find some of the results of our endeavors.  Our first grade engineers really rocked the house with their stamped out bots.  Way to go, First Grade.  Take a look:
Mrs. Maples' class, stamping their robots.
Great job, First Grade Engineers!  We are ready to get our robots working for us. 

Saturday, February 23, 2013

4th Grade Styrofoam Printmaking


RNE's 4th graders had a great chance to get creative both with watercolor and printmaking in our last 2-D project.  We painted concentric circles on 8" x 8" watercolor paper, moving analogously in our circles.  We learned about the grand rose windows that grace European cathedrals, discussing their radial symmetry and the organic and geometric shapes that make up a rose window.


 After learning how we could make radial designs by working on a diagonal within a square and then placing it repeatedly in quadrants, we began working on a diagonal design using both geometric and organic shapes.  Students deeply etched in their designs on a 4" x 4" styrofoam plate with a ball point pen, working from one corner outward on a diagonal.


 Inking stations were set up on each table; students inked on black block printing ink and brayed the plate four times (re-inking each time), rotating the plate circularly until all four quadrants had printed.  The result was a radial design that echoed the rose windows we had studied.  Beautiful job, fourth graders!